Tuesday, 6 August 2013
Monday, 15 July 2013
GLUTE WORKOUT ROUTINE
Equipment Needed: Dumbbell or Barb bell.
Frequency: Twice / Week

Rest and stretch: Sometimes you have to take a short break in the middle of a set. Instead of dropping the weight, just pause for a second. Tell yourself, "I only have x reps to go." If your hamstrings or glutes tighten, take a minute between sets to stretch the muscles. You will feel tightness in your glutes and where the glutes and hamstrings merge.
Stay Healthy
The Delaterre Team
Tuesday, 9 July 2013
RUNNER’S ITCH

Yesterday, I decided to do a round of cardio just after weight training.
Routinely, I incorporate cardio indirectly into my Sunday workouts by cycling
to/from my house to the National stadium and to the pool immediately after. I
like to workout at kill-yourself pace where my lungs are starved of sufficient
oxygen and my heart-rate is up to about 150BPM (beats per minute). Doing cardio
(usually swimming in my case) right after such strenuous anaerobic activity serves
as an excellent catalyst for Beta oxidation (fat burning), and ensures my
aerobic threshold and lung capacity are put on blast.
And so it went that on this day my
bike had issues and I had to do the distance between my house and the National
stadium on foot. An hour and a half later of weight training and I was set for
cardio, this time running, as no bicycle automatically meant no swimming.
Headphones in, timer on set, I started out. Sauntering along those first few,
lazy motions and breaking into a full gallop after about 50 yards. 300 yards
in, and just when I was getting into the whole groove I slowed to a halt. It
had happened; my brain had sent warning signals to my body. Those all too familiar warning signals my
body gets every time I put it through this hardly physical exertion of a mere
jog. Down but determined not to be out, I continued, determined to ignore those
lying signals and finish my race at all costs.
Mind kept telling body to ignore
brain and continue even when body knew better than to play mind games with
brain. So this time I forged ahead as slowly as ever, until I was sure my body
was interpreting the activity as a diluted jog and not a full-on sprint. Well
all of that didn’t mean a thing after the next 100 yards as it was all over. Just
like that. I had stopped again. Blimey, I hadn’t even completed the first lap
of my timer! I propped myself on my knees for a minute to catch my breath and
take in the disappointment of the moment, and thence I made to go home with all
running engagements for the day cancelled with immediate effect.
I hate running. A lot. I try to do
cardio once a week; swimming, cycling, running, the elliptical machine. Running
is always the last resort when all else fails and even at that I almost never
run. The few times I do, I make a conscious effort to keep it at absolutely
low-intensity steady state (LISS) – we’ll explain that some other time. You
see, my dislike for running is so deeply-rooted that only time I’m big on it is
when it takes the shape of Usain Bolt on TV, I know you wonder why I hate
running this bad, which brings me back to the topic of this article, and why I
stopped yesterday’s jog prematurely; “Runner’s
itch”.
For as long as I can remember I’ve suffered from “Runner’s itch”. Way back in high school we used to jog outdoors on
weekends and I remember suffering from unbearable itching that starts from the
calves, up to the buttocks and thighs, and all the way up to the stomach. We
used to run in very low, humid temperatures and I used to attribute the itching
to my skin’s contact with the moist grass along our running path. I get this
itch too when I’m subjected to bumpy motorcycle rides so my last reason being
exposure to humid temperatures isn’t entirely tenable.
Well I never held much thought much to the itching till I left high
school and the itching continued into my adult life with every run/jog. I asked
a few people and no one seemed to have similar experiences. I feared I was
different not until I fell in love with fitness and started reading tons of stuff
online on health and exercise. Thankfully, I’m not alone, a lot of people
suffer from “Runner’s itch” too and
some even have far worse experiences. If you’re one of many people who suffer
from this, I hope this article finds you and frees you from the mental shackles
tying you from your fitness goals.
So what causes “Runner’s itch”?
The human body is made up of major blood
vessels and millions of smaller ones known as capillaries. During a prolonged
spell of inactivity (non-exercise), these capillaries collapse and shrink due
to the decrease in blood flow. Now when you decide to hit the gym or run, these
capillaries start to expand due to the increase in blood flow and rapid heart
beat. As these capillaries continue to expand as a result of increase in blood
supply, the neighboring nerves send impulses to the brain which is interpreted
as the urge to itch. Simple.
There isn't much rocket science to it. Good
thing is the itching goes away after a while (that’s if you can withstand not
scratching yourself to death). In cases of a prolonged sedentary lifestyle, it
might take the body some getting used to before the itching ebbs away. Another
reason for the itch could be traced to the accumulation of mast cells after a
period of inactivity. These mast cells undergo lysis (cell destruction) which
is brought on by exercise and release histamine which could cause itching. In
this case, taking an antihistamine 30 minutes before working out would suffice
and help reduce the itch. But be warned that your body becomes dependent on the
antihistamine and the itching returns when you’re off the medication. Also try
to avoid taking Aspirin or any NSAIDs (Non-steroidal anti-inflammatory drugs) e.g.
Paracetamol, Acetaminophen before working out.
Whatever you read on the
internet, remember to always consult your physician before taking any of these
measures.
Another factor that could also trigger the itching is cold or hot
temperature. In the case of cold weather, the body pumps more blood to our
organs to keep them warm and less blood to your running legs and arms. As a
result, your arms and legs are cooler than other parts of your body. As you
warm up, the circulating warm, oxygen-rich, blood reaches your legs and your
skin cells transmit signals to your brain that are interpreted as an itch.
Itching in such cold temperatures (indoors or outdoors), may be referred
to as “cold urticaria” or what is known as an “allergy to cold” in
layman language.
On the other hand, itching caused
mainly by running or exercise may be called “exercise-induced vasculitis”.
Asides from the instances stated
above, there have been cases of people who suffer from medical conditions like
diabetes, hypothyroidism and low-blood pressure that have been known to cause circulatory
trouble. Hygiene could also play a part here. Tight clothes and dirty clothes
carry bacteria that can irritate the skin and cause itching.
After all that has been said, long
and short of story is that if you've ever run and experienced “Runner’s itch”, it’s just your body’s
way of telling you you've been inactive for too long. Taking medication, a
shower or applying lotion can help with the itch but there’s never been a
better tonic to kick that itch than exercise. Once you feel that itch, don’t be
discouraged, get back at running soon again. The itch goes away after one or
two more jogs. Get up and be proactive.
Don’t wait for that itch to be a
barometer for measuring your inactivity. Embrace an active lifestyle of
frequent exercise instead of a sedentary one of excuses and half-resolutions. Make
that money but don’t take life too serious. You only live once. If you exercise
regularly, love and live well, once is enough. Shalom.
Written by: @Jeffiejay
Wednesday, 19 June 2013
ADVANCED 2 HOUR FULL BODY WORKOUT ROUTINE BY JOEY
Hey Fitfam,
So our friend Joey (who is a mad BEAST in the gym) designed this 4 circuit, full body workout routine below. Its is for the advanced gym rat! Although, the circuits can be attempted by anyone if its divided into 2 or 4 separate routines for different days of the week. But if you have 2 hours to spare (weekends) or need something that'll challenge you, then do the entire 4 circuits as one workout. Enjoy!
Note: Max rep – Do as many as you can
So our friend Joey (who is a mad BEAST in the gym) designed this 4 circuit, full body workout routine below. Its is for the advanced gym rat! Although, the circuits can be attempted by anyone if its divided into 2 or 4 separate routines for different days of the week. But if you have 2 hours to spare (weekends) or need something that'll challenge you, then do the entire 4 circuits as one workout. Enjoy!
- Warm up: 6 Minutes
|
BODY WEIGHT MAXIMUM REPS///Circuit 1
|
|||
|
|
MAX
REP
|
MAX
REP
|
MAX
REP
|
|
One
Arm balance PushUps(20-30)
|
|
|
|
|
Pike
Presses(15-25)
|
|
|
|
|
Dips(20-35)
|
|
|
|
|
Plyo
Lunges(30-50)
|
|
|
|
|
Wide
Arm Pull Ups
|
|
|
|
|
One
Arm balance PushUps(20-30)
|
|
|
|
Circuit
2 (Use Challenging Weights)
|
|||
15 Reps
|
12 Reps
|
8 Reps
|
|
Barbell Bench Press
|
|||
Deep Squats
|
|||
Seated Shoulder Press
|
|||
Barbell Rows
|
|||
Smith Machine Hip Ups
|
|||
Dumbbell Swing (30 secs Each
Arm)
|
|||
Circuit
3 (Use Challenging Weights)
|
|||
15 Reps
|
12 Reps
|
8 Reps
|
|
Inclined Bench Press
|
|||
Tricep Pulldowns
|
|||
Upright Row to Shoulder
Press
|
|||
Stiff Legged Deadlifts
|
|||
Inverted Rows
|
|||
Mountain Climbers(1 Minute)
|
|||
Circuit
4 (Use Challenging Weights)
|
|||
15 Reps
|
12 Reps
|
8 Reps
|
|
Inclined Dumbbell Flys
|
|||
Split Squats
|
|||
Closed grip Bench Press
|
|||
Back Flys
|
|||
Shoulder Flys
|
|||
Renegade Rows(1 Minute)
|
|||
Stay Healthy
The Delaterre TGZ Team
Tuesday, 18 June 2013
HOW TO MAKE TOFU
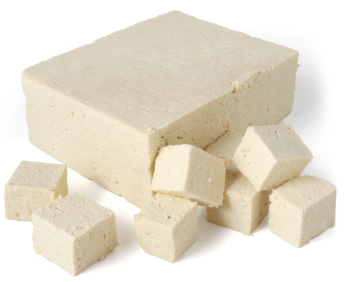
Tofu, also called bean curd, is a food made by coagulating soy milk and then pressing the resulting curds into soft white blocks. It is a component in many East Asian and Southeast Asian cuisines. Its very high in protein with 8g and only 1.9g 100g of Tofu and a staple food for vegans and vegetarians.
Ingredients
- Dry soya beans - 3 cups
- 75ml of lemon juice.
- blender
- 2 large pots
- 1 strainer
- mesh bag (or garri/rice bag)
Instructions
- soak soy beans in water overnight.

- Rinse the soaked beans and discard any discolored ones if you spot any.Blend a little at a time with enough water to cover the beans. Add the processed beans to your largest pot with 12 cups of water.

- Stir frequently and simmer for about 20 minutes on stove. This will foam up a bit so be careful not to let it boil over.

- Strain into your second pot. Use a spoon to press out as much of the milk as you can. The liquid is soy milk. The solids are okara. You can take out a jar or two of soy milk at this point and continue making the rest into tofu.


- Heat the soy milk back up to around 180 degrees. Dissolve 2 TBSP of Epsom Salt in 1 and 1/2 cups of warm water or Alternatively you could use 75ml of lemon juice.
- Remove from heat and gently stir together.
- In about 5 to 10 minutes the curds will separate.

- Your colander with a mesh bag or cloth makes an excellent mold. Skim out curds and pour into mold.
- Press down with a small plate and heavy object.
- Leave for about 20 minutes.


There! That's it. Some soy milk, okara (for soy burgers) and tofu. Enjoy
Stay Healthy
The Delaterre TGZ Team
Reference
How to Make Tofu: http://www.instructables.com/id/How-to-Make-Tofu/?ALLSTEPS
Friday, 14 June 2013
STARTING A FITNESS JOURNEY

Today a friend of mine
approached me and asked, if I wanted to write something for a fitness blog. I
was a bit skeptical at first, mostly because I'm still trying to reach a
target, I'm still learning new things everyday about nutrition and training and
there are still many unanswered questions I have.
Best place to start from is
the basics. Goal setting. You have your starting point, which is where you are
presently. Morbidly obese, a little below average, it mostly boils down to
wanting to look and/or feel differently.

Next, there's a destination. This is
about knowing when you want to get there and what you want to look like when you're
there. Maybe you want to look like and feel like an athlete, a model, or a
contender for Mr/Ms Olympia (:D). You already have an image.
Next thing you
have to do is write it down, and refer to it from time to time. These goals are
what will keep you in line over the period, before you attain it. The truth is
once you reach a particular fitness goal, you will want to reach another one,
because there is no final destination. There is always, the next level.
The next thing you have to do
is to work on your nutrition. 70-80% of the work you have to do towards
changing your body, is changing what you put into your mouth. It will involve
preparing your own meals, counting calories taken in, eating every 2-3 hours, which
will add up to about 5 or 6 meals a day, depending on your workout schedule.
I'm assuming you're going to be working out.
If you're going to be a couch
potato, you might as well stop reading.

Each of these meals
absolutely must have a moderately sized serving of carbohydrates, a large
serving of proteins and a moderate serving of unsaturated fats. Depending on
your goals, you could alter the ratios between carbohydrates and proteins.
Finally,
you have to ditch the junk. Fried meats, cookies, candy, fries, alcohol, cream
in coffee, processed sugar, you know them. You might think you like them, but
they are actually what is keeping that layer of fat on your body. But its not
just that, the way you cook your food could turn a nutritious meal into very high
calorie junk.
Do some research on healthier, low fat cooking techniques, there are a lot
of them. And try as much as possible to avoid cheat meals, especially if your
goal is fat loss. In fact, don't try, just avoid them.

The other part of the equation
is exercise. Get in at least 45 minutes each of aerobics and weight training
5-6 days a week, male or female. If you want to go hard core, you can replace
aerobics with high intensity interval training. It will make your heart rate
better and its good for your brain. And also learn to mix it up from time to
time. There are millions of exercise programs on the internet that you can do
even from the comfort of your home. Some require you to invest in
some.equipment, others don't. Or you could get books pen exercise routines.
There are so many means available if you have the right mindset and willpower
to achieve your fitness goals.
Hopefully I will share more
stuff on fitness and nutrition as time goes by, but for now I will leave you
with this. Keep pushing the limits, keep raising the bar.
Writer: Joey
Stay Healthy
The Delaterre Team
Thursday, 13 June 2013
WINNERS OF THE SHRED GREEN SMOOTHIE CHALLENGE
Hey Fitfam,
"Resistance Bands Set" Winners
@priiye & @akunamdee

"Heart / Pulse Rate Monitor & Calorie Counter Watch" Winners
@vesselmakeup, @mzystique & @_OGECHUKWU


"Accu-Measure Body Fat Caliper" Winners
@Tennaira & @aidazzle
@Tennaira & @aidazzle


Congratulations guys.
Stay Healthy
The Delaterre Team
CARB NITE RECIPE (LOW CARB): COCONUT FLOUR PANCAKES
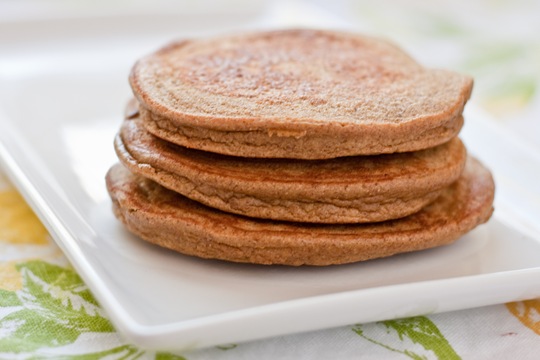
COCONUT FLOUR PANCAKES
Ingredients
- 4 eggs room temperature
- 1 cup coconut milk OR 1/4 cup whole milk,
- 2 teaspoons vanilla extract (optional)
- stevia,
- 1/2 cup coconut flour
- 1 teaspoon baking soda
- 1/4 teaspoon salt
- olive oil (you can use coconut oil or butter for frying)
Directions
- Preheat frying pan over medium-low heat. In a small bowl beat eggs until frothy, about two minutes. Mix in milk, vanilla, and stevia.
- In a medium-sized bowl combine coconut flour, baking soda, and salt and mix together. Stir 3/4 of wet mixture into dry until coconut flour is incorporated. Allow to sit for 3-5 minutes.
- At this stage your batter should be thick, almost like brownie batter. If it is still fairly thick and dry add the rest of the wet mixture.
- Grease pan with butter or oil. Ladle a few tablespoons of batter into pan for each pancake.
- Spread out slightly with the back of a spoon. The pancakes should be 2-3 inches in diameter and fairly thick.
- Cook for a few minutes on each side, until the tops dry out slightly and the bottoms start to brown. Flip and cook an additional 2-3 minutes.
- Serve hot with yogurt, butter or fruit.
Macros
- Protein - 24g
- Carb - 36g, Fiber - 21g (usable carbs = (total carbs - fiber) = 25g)
- Fat - 36g (good fat mostly from olive oil.)
References
- Coconut flour pancakes: http://www.edibleperspective.com/home/2010/5/17/here-i-am.html
- Grain-Free, Dairy-Free Coconut Flour Pancakes: http://www.plantoeat.com/blog/2013/05/grain-free-dairy-free-coconut-flour-pancakes/
Stay Healthy
The Delaterre Team
Wednesday, 12 June 2013
Delaterre Shred Phase III Meal Plan: Carb Nite Solution
A lot of you have questions about the carb nite approach we're utilizing for the Phase III of the Shred Challenge .

Carb Nite Solutions (CNS): Designed specifically for ongoing fat loss, not just weight loss. It is a tool, not a lifestyle, designed to promote optimal health and optimal body fat loss. This simultaneously raises HDL levels, improves insulin sensitivity, and lowers both triglyceride and LDL levels. There is emphasis on maintaining muscle size and strength during weight loss.
The 1st 10 days of the Carb nite diet is called the "recalibration period". During this period, you keep your body in ketosis.
Ketosis /kɨˈtoʊsɨs/ is a state of elevated levels of ketone bodies in the body. Ketone bodies are formed by ketogenesis when liver glycogen stores are depleted.When glycogen stores are not available in the cells, fat (triacylglycerol) is cleaved to provide 3 fatty acid chains and 1 glycerol molecule in a process known as lipolysis. Most of the body is able to use fatty acids as an alternative source of energy in a process called beta-oxidation.
What does ketogenic mean? Well, there are enzymes that your body produces that convert carbohydrates into fat to be stored. Keeping carbs low at 30g / day blocks these enzymes by elevating ketones, so the carbohydrates are used as opposed to stored. Increasing to even 50 or 60 can trigger fat storing enzymes.
In lay man's terms, the calibration period is done to force your body into ketosis, so it starts to burn your stored fat cells for energy. Consuming 30g or less of carbs keeps your body in that mode.
Cons of CNS
- Its difficult for most people. You need to be disciplined and dedicated to your goals to enjoy the benefits of CNS.
- It involves very limited range of foods. You'll be eating only protein with your carbs coming from vegetables.
- Performed the wrong way could lead to weight gain.
Pros of CNS
- It works. Performed the right way will force your body to burn those stubborn fats.
- You get to eat your favourite foods every 7 days after your recalibration period.
- You burn fat while maintaining muscle mass.
- For the Shred participants: we want you to be conscious of the macros in your meals. To understand them.
The stages
Reorientation / RecalibrationFor the first nine days, keep carbohydrates to 30g or less per day, not counting fiber grams . Eat enough food to keep hunger under control without counting calories.
TOTAL GRAMS OF CARBS - TOTAL GRAMS OF FIBER = USABLE CARBS
Carb Night
Day ten: begin day as normal. Starting between 5-7pm, eat a sizable amount of carbs: pasta, fruits, potatoes, bread, pie, whatever. Eat carbs the rest of the evening.
Note for females: Thanks to your hormones (estrogen: especially during your ovulation period), you aren't free to carb up on anything like your male counterparts. Your body may tend to hold on to water weight. Don't worry, it will shed it in a few days. Also, during your carb nights, Please keep it as low fat as possible. So limit dairy and high fat foods like icecream, full cream milk, oreos, etc. Carb up on white bread, rice, fruits....etc.
Dairy has chemicals in it that are cannabinoid. These chemicals stimulate the same receptors in the brain that smoking weed does. Which makes you hungrier.
The Morning After
Go back to 30g or less of carbohydrates per day.
The Rules
- Eat Plenty of Fat.Your body needs an alternate fuel source. Avoid 'low fat' products.
- Enjoy a FULL Carb Night. It is not Carb MEAL. You're looking for 6-8 hours of eating carbs. Say, an early supper, late dinner, with snacks in between and after. You don't need to have large amounts of food, even just snacking on fruit all night does the trick.
- Never Skip a Carb Night. Carb night keeps your body in an accelerated fat-burning state. Plus, it will drive you crazy.
- Never have Carb Night Sooner than the FIFTH day after your last one. The body needs at least four days to totally shed all stored carbs from carb night and for the carb storing enzymes to fade. Sooner than that could result in fat-gain.
We know this will be challenging to you. But we're confident that you can do it. You held on till this time, 4 weeks is a piece of cake. If you need help please contact us via twitter or our email address delaterre.ng@gmail.com .
Stay Healthy
The Delaterre TGZ Team
REFERENCES
- Ketosis: http://en.wikipedia.org/wiki/Ketosis
- Carb nite: http://crossfitchallenge732.blogspot.com/2012/07/carb-nite-cliff-notes.html
Friday, 10 May 2013
HOW TO MAKE COCONUT FLOUR

Coconut flour is a delicious, healthy alternative to wheat and other grain flours. Ground from dried, defatted coconut meat, coconut flour is high in fiber and low in digestible carbohydrates. A single 2 Tbsp serving of coconut flour delivers 60 calories, 5 grams of fiber with only 8 grams of carbs. This makes it ideal for those following the paleo diet or who need to be carb conscious for their health. Coconut flour is also gluten free.
Due to the high fiber content, coconut flour swells like crazy, creating much more volume, so when cooking with it, you will use a lot less than you would use if you were cooking with another flour (whole wheat, white flour or oats), thus reducing the number of calories in the final product.
The light coconut flavor allows coconut flour to blend seamlessly into sweet or savory baked goods. It makes a wonderful coating for chicken, fish or other proteins in place of regular flour or cornmeal. Because of its high fiber content, baking with coconut flour is a unique experience. Coconut flour requires an equal ratio of liquid to flour for best results.
HOW TO MAKE COCONUT FLOUR
- Purchase your coconuts, remove from shell and chop into small pieces.
- Using a food processor, process the coconut until it is smooth.
- Put all of the coconut mixture into a cheesecloth (sieve) and squeeze as much as you can. Get all of the water out of it. This fluid is the coconut milk. Refrigerate the coconut milk for use.
- Spread the pulp in the cheesecloth onto a baking sheet.
- Bake in a 95 degree Celsius oven until dry.
- If you don't have an oven, you could also pour the pulp in a tray and spread thinly. Dry in the sun until it all moisture is removed.
- Pour dried pulp in a food processor (blender) and blend until you have the flour that you need.
A low energy alternative to the food processor is a mortar and pestle. Extra arm and shoulder workout to pound the pulp to flour. :)
Stay Healthy
The Delaterre TGZ Team
References
- Photo: http://www.realfoodstore.co.uk/organic-coconut-flour/
- How to make coconut flour: http://www.wikihow.com/Make-Coconut-Flour-With-Flaked-Coconut
- Bob's red mill Organic coconut flour: http://www.bobsredmill.com/organic-coconut-flour.html
Subscribe to:
Comments (Atom)